Kids Special

istockphoto 117707989 612x612

Proven Strawberry Baby Food Recipe for Happy Tummies

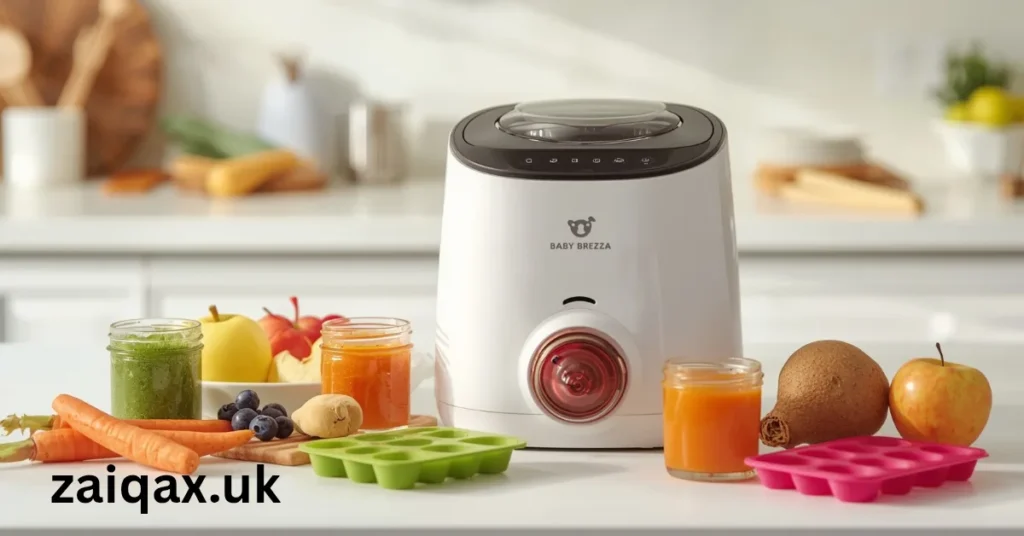
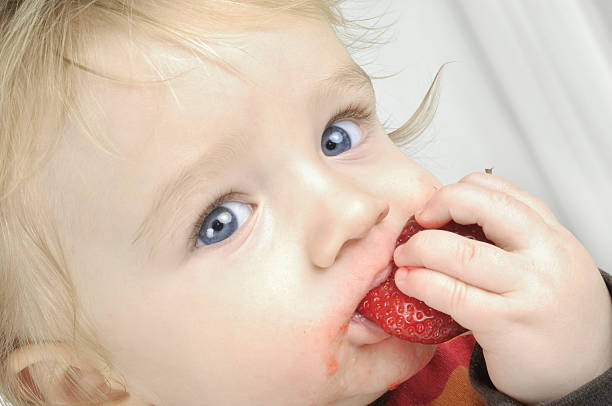
Strawberries are not just delicious. They are also full of nutrients. Babies love their sweet taste. Parents love their health benefits. If you’re looking for a proven strawberry baby food recipe for happy tummies, you’re in the right place. We will discuss here  all the details starting from reasons why strawberries are good for babies, to recipes, storage, feeding tips and much more.   Together we can make healthy eating enjoyable! Why Choose Strawberries for Baby Food? Strawberries are full of  vitamins. Strawberries contain vitamin C, fiber, and antioxidants. These help your baby grow strong. They also help in digestion and boost the immune system. Here are some quick benefits: Vitamin C helps absorb iron. Fiber aids digestion. Antioxidants protect cells. Natural sweetness makes it baby-friendly. But wait—can babies eat strawberries? Let’s cover that next. When Can Babies Eat Strawberries? Most doctors say babies can have strawberries at around 6 months. This is the usual age to start solids. But every baby is different. Here’s what to keep in mind: Talk to your pediatrician first. Watch for any signs of allergies. Start with a small amount. Strawberries are not a common allergen. But they can cause a rash around the mouth. It’s usually from the fruit’s natural acid. This is normal for many babies.   Now that you know it’s safe, let’s move to the exciting part—the recipe! Proven Strawberry Baby Food Recipe for Happy Tummies Here is a simple, tried-and-true recipe that parents swear by. It’s fresh, flavorful, and gentle on little tummies. Ingredients: 1 cup of fresh, ripe strawberries 2 tablespoons of water or breast milk (optional) Tools Needed: Blender or food processor Fine mesh strainer (optional) Knife and cutting board Spoon and storage containers Instructions: Wash the Strawberries Rinse the strawberries under cold water. Make sure they are clean. Remove the Stems Cut off the green tops using a knife. Cut into Small Pieces Slice the strawberries to help them blend easier. Blend Until Smooth Place them in a blender or food processor. Blend until you get a smooth puree. Optional: Add Liquid If the mix is too thick, add a little water or breast milk. Blend again. Optional: Strain the Puree For younger babies, you can strain the puree to remove seeds. Cool Before Serving Let the puree cool before feeding your baby. Texture Tips for Each Stage Babies go through different stages. Their chewing skills grow with time. Here’s how to adjust the texture: Stage 1 (6–7 months): Puree until very smooth. No chunks or seeds. Serve plain or mix with breast milk. Stage 2 (8–9 months): Mash with a fork for a thicker texture. Add mashed banana or yogurt. Stage 3 (10+ months): Offer small soft chunks. Mix with oatmeal or cottage cheese. Smart Add-Ins for More Flavor You can pair strawberries with other baby-friendly foods. These add variety and nutrition: Banana – adds creaminess Avocado – healthy fats Oats – fiber boost Greek yogurt – protein and probiotics Applesauce – natural sweetness Mixing new foods can make mealtime exciting! How to Store Strawberry Baby Food Making baby food ahead saves time. Here’s how to store it safely: In the Fridge: Use airtight containers. Lasts for up to 3 days. In the Freezer: Use ice cube trays or baby food molds. Freeze for up to 3 months. Label with date. To Reheat: Use a warm water bath or baby food warmer. Stir well and test the temperature. Never refreeze food once thawed. Signs Your Baby Loves the Recipe Wondering if your baby enjoys this recipe? Look for these happy signs: Opens mouth eagerly Smiles or makes happy noises Finishes the serving No tummy troubles after eating A proven strawberry baby food recipe for happy tummies should make your baby full and cheerful. That’s the goal! Troubleshooting Common Issues Sometimes, feeding doesn’t go as planned. Here’s how to handle common problems: Baby Refuses to Eat: Try again later. Mix with a favorite food. Change the texture. Rash Around the Mouth: Often caused by acidity. Wipe the face after eating. Stop feeding if rash gets worse. Loose Stool or Gassiness: Reduce serving size. Mix with binding foods like rice cereal. Make It a Full Meal You can turn the strawberry puree into a full meal: Mix with oatmeal and breast milk for breakfast. Pair with mashed sweet potato for lunch. Add to plain yogurt for a snack. Keep it balanced. Variety keeps your baby’s gut and taste buds happy. Baby-Led Weaning Strawberry Ideas Doing baby-led weaning? Skip the puree. Try these soft options: Ripe strawberry halves (for older babies) Strawberry slices rolled in baby cereal Cooked strawberry pieces in pancake batter Always watch your baby while eating. Make sure the pieces are soft and easy to gum. Benefits for Baby’s Digestion Why does this proven strawberry baby food recipe for happy tummies work so well? Strawberries are: High in water (keeps baby hydrated) Easy to digest (when pureed) Mildly fibrous (helps avoid constipation) Naturally sweet (no sugar needed) Babies with gentle tummies often do well with strawberries. Making Mealtime Special Use bright bowls and baby spoons. Play soft music. Talk or sing during feeding. These little things matter. They help your baby enjoy the food. Happy mealtimes build trust and good habits. What Other Moms Say We asked real moms what they think: Ayesha, mom of 1-year-old: “My baby lights up when she sees the red color! This recipe is a winner!” Mina, mom of twins: “I blend strawberries with banana and oats. No tummy troubles at all!” Hina, first-time mom: “Started at 6 months. She loved the taste. No added sugar needed!” This proves it’s a trusted and proven strawberry baby food recipe for happy tummies. Doctor’s Advice Always check with your baby’s pediatrician before starting new foods. Especially if there’s a family history of food allergies. Start slow. Watch your baby. Keep a food diary if needed. Fun Strawberry Facts for Kids Want to make strawberries even more fun? Share these cute facts: Strawberries

Proven Strawberry Baby Food Recipe for Happy Tummies Read More »

zaiqax.uk 20250911 215052 0000

Smart Moms Choose These Baby Brezza Recipes

Are you a busy mom looking to make healthy food for your baby? Do you want something quick, easy, and full of goodness? If yes, you’re in the right place. Smart moms choose these Baby Brezza recipes to save time and give their babies tasty meals. With the Baby Brezza food maker, you can steam and blend food in minutes. It’s a game-changer for new parents. In this guide, you’ll find the best baby food recipes using the Baby Brezza. Each recipe is easy, nutritious, and baby-approved. Let’s dive into it! Why Smart Moms Love the Baby Brezza Food Maker The Baby Brezza food maker is more than a kitchen gadget. It’s a lifesaver. Here’s why: One-touch operation – just press a button. Steams and blends in one step. Easy to clean – no mess. Saves time – perfect for busy moms. Preserves nutrients in fruits and veggies. The Baby Brezza is great innovative equipment for meal prepping fun and quick whether you are a first-time or experienced mom. When to Start Using Baby Brezza Recipes Routine checkups with your doctor are needed to determine ideal time frames to venture into solids which is typically between 4-6 months. During this period make sure to single ingredient purees for starters. Prepped food at intervals helps them know their body better. You will be able to prepare smooth four different varieties from scratch helping your little one relish the flavors with utmost love and joy using baby brezza. Tips Before You Start Cooking Before we get into the recipes, here are a few tips: Always wash fruits and veggies well. Peel and chop food into small pieces. Use fresh and organic ingredients if possible. Steam until soft to help with digestion. Start with small amounts and increase as needed. Now let’s get to the good stuff—the recipes smart moms swear by. Stage 1: Single-Ingredient Purees (4-6 Months) 1. Apple Puree Smart moms choose this Baby Brezza recipe first. Ingredients: 1 peeled apple, chopped Instructions: Add apples to the Baby Brezza. Select steam + blend for 10 minutes. Let it cool and serve. Benefits: Full of  fiber and vitamin C. 2. Carrot Puree   Ingredients: 1 peeled carrot, chopped Instructions: Steam + blend in Baby Brezza for 15 minutes. Let it cool and serve fresh. Benefits: Great for eye health. 3. Pear Puree Ingredients: 1 ripe pear, peeled and diced Instructions: Use steam + blend for 10 minutes. Serve once cooled. Benefits: Soft on baby’s tummy 4. Sweet Potato Puree Ingredients: 1 small sweet potato, cubed finely Instructions: Steam + blend for 20 minutes. Check texture and serve. Benefits: Rich in  vitamin A and fiber. Stage 2: Two-Ingredient Combos (6-8 Months) 5. Apple and Carrot Mash Smart moms choose these Baby Brezza recipes for growing babies. Ingredients: 1 apple 1 carrot Instructions: Add both ingredients to the Baby Brezza. Steam and  blend for just 15 minutes. Benefits: Sweet and rich in nutrients. 6.Mash of  Banana and Avocado  Ingredients: 1 ripe banana ½ avocado Instructions: No need to steam. Just blend using the Baby Brezza blend setting. Benefits: High in healthy fats and potassium. 7. Spinach and Sweet Potato Ingredients: 1 handful fresh spinach 1 small sweet potato Instructions: Steam + blend for 20 minutes. Benefits: Iron and vitamin A combo. 8. Blueberry and Pear   Ingredients: ½ cup blueberries 1 pear Instructions: Steam + blend for 12 minutes. Benefits: Antioxidants and natural sweetness. Stage 3: Protein-Rich Purees (8-10 Months) 9. Chicken and Carrot Puree Smart moms choose these Baby Brezza recipes to add protein. Ingredients: ½ chicken breast (boneless) 1 carrot Instructions: Chop chicken into small pieces. Add carrot and chicken to Baby Brezza. Steam + blend for 20–25 minutes. Benefits: Protein and vitamins for growth. 10. Lentils and Carrots Ingredients: ¼ cup cooked red lentils 1 carrot Instructions: Steam carrot in Baby Brezza. Add cooked lentils. Blend until smooth. Benefits: Plant-based protein and fiber. 11. Egg Yolk and Avocado Ingredients: 1 hard-boiled egg yolk ½ avocado Instructions: Blend both ingredients until creamy. Benefits: Iron, healthy fats, and brain-boosting nutrients. 12. Beef and Sweet Potato Ingredients: ¼ cup cooked ground beef ½ sweet potato Instructions: Steam sweet potato. Add cooked beef. Blend together. Benefits: Iron and energy for active babies. Stage 4: Chunky Textures and Finger Foods (10-12 Months) 13. Broccoli and Cheese Mash Ingredients: 1 cup broccoli florets 2 tbsp shredded cheese Instructions: Steam broccoli. Add cheese and blend briefly. Benefits: Calcium and flavor. 14. Quinoa and Banana Mash Ingredients: ¼ cup cooked quinoa 1 banana Instructions: Mix and blend until soft. Benefits: Protein and carbs for energy. 15. Pasta and Veggie Mix   Ingredients: ¼ cup cooked baby pasta ¼ cup steamed mixed veggies Instructions: Blend lightly for texture. Benefits: Balanced and hearty. Storage Tips for Baby Brezza Meals Smart moms choose these Baby Brezza recipes and store them right. Store in airtight containers. Refrigerate for up to 3 days. Freeze for up to 1 month. Use baby food trays or ice cube trays for small portions. Label with name and date. Always warm gently and stir before serving. Common Questions Moms Ask Q: Can I use frozen fruits or veggies? Yes, but thaw them before using in the Baby Brezza. Q: Can I add spices or herbs? Mild herbs like basil can be added after 8 months. Avoid salt and sugar. Q: How often should I make baby food? You can prep a week’s worth and freeze it. Batch cooking saves time. Q: What texture should baby food be? Start with smooth purees and move to thicker textures slowly. Bonus: Smart Feeding Schedule Example Baby’s Age Meal Frequency Recipe Examples 4–6 Months 1x/day Apple puree, carrot puree 6–8 Months 2x/day Apple-carrot, banana-avocado 8–10 Months 3x/day Chicken-carrot, lentil mix 10–12 Months 3 meals + snacks Broccoli-cheese, pasta veggie mix Final Thoughts Smart moms choose these Baby Brezza recipes because they are fast, healthy, and full of flavor. Your baby gets the nutrition they need, and you save time every day.

Smart Moms Choose These Baby Brezza Recipes Read More »

zaiqax.uk 20250911 122029 0000

How to Make Spinach Balls That Kids Will Love

  Looking for a wholesome snack your kids will truly enjoy? You’re in the right place. In this guide, we’ll show you how to make spinach balls that kids will love—easy, cheesy, and absolutely delicious. These little green bites are full of flavor. They’re soft on the inside, lightly crispy on the outside, and packed with nutrients. Plus, they’re fun to eat! Let’s get started. Why Kids Will Love These Spinach Balls Most children don’t like spinach. It’s green, leafy, and looks strange. But not when you turn it into tasty, bite-sized balls! Here’s why these spinach balls are kid-approved: They look like fun finger food They taste cheesy, not “green” Easy to dip in ketchup or ranch Soft texture, not bitter Kids can help make them, too This recipe hides the spinach flavor so well, even picky eaters will say “yum.”   Ingredients You’ll Need This is a simple recipe with everyday ingredients. Here’s what you’ll need: Basic Ingredients: 1 package (10 oz) frozen chopped spinach 1 cup breadcrumbs 1 cup shredded mozzarella or cheddar cheese 2 large eggs 1/4 cup grated Parmesan 1/2 tsp garlic powder 1/2 tsp onion powder Salt and pepper to taste Optional Add-ins (for more flavor): 1 tbsp fresh parsley 1/4 tsp Italian seasoning Pinch of chili flakes (for older kids) Feel free to mix and match based on your child’s taste. Step-by-Step Instructions Step 1: Thaw and Drain the Spinach Place the frozen spinach in a bowl and let it thaw completely. Once thawed, squeeze out all the water using a clean towel. This step is crucial—wet spinach will make the balls mushy. Step 2: Mix the Ingredients In a large bowl, combine: Drained spinach Eggs Cheese Breadcrumbs Spices Mix well until everything comes together. The mixture should hold when pressed. Step 3: Shape the Balls Take a spoonful of the mixture and roll it into a small ball (about 1 to 1.5 inches wide). Place them on a baking tray lined with parchment paper. Step 4: Bake or Air-Fry Oven Method: Preheat to 375°F (190°C) Bake for 18–20 minutes or until golden Air Fryer Method: Preheat to 375°F Cook for 10–12 minutes, shaking halfway through Step 5: Cool and Serve Let the spinach balls cool slightly before serving. Serve warm with a kid-friendly dip. Tips to Make Them Even Better Use fresh spinach if you prefer—just steam and chop Add cooked rice or mashed potato for a softer texture Use cookie scoops for evenly sized balls Sprinkle extra cheese on top before baking Dipping Sauce Ideas for Kids Dips make everything more fun! Try these with spinach balls: Ketchup (classic and kid-favorite) Ranch dressing Cheese sauce Garlic yogurt dip Honey mustard Let kids choose their favorite dip to make snack time more exciting. Variations to Try Want to switch things up? Try these fun versions: Cheesy Pizza Spinach Balls Add mini pepperoni bits and a pinch of oregano. Serve with marinara sauce. Potato Spinach Balls Mix in mashed potatoes for added softness. Chicken and Spinach Balls Mix in cooked shredded chicken for extra protein. Hidden Veggie Spinach Balls Grate in carrots or zucchini—kids won’t notice! Gluten-Free Spinach Balls Use gluten-free breadcrumbs or almond flour. Make-Ahead and Freezer Tips To Refrigerate: Store uncooked spinach balls in the fridge for up to 24 hours, then bake when ready. To Freeze: Place raw balls on a tray and freeze for 2 hours. Then transfer to a zip bag. Bake directly from frozen—just add 5 extra minutes. Spinach balls freeze well and reheat easily. How to Involve Kids in Cooking Kids love helping in the kitchen. Let them: Crack the eggs Stir the mixture Roll the balls Sprinkle cheese It’s fun and teaches healthy eating habits early on. Nutritional Benefits of Spinach Balls These aren’t just tasty—they’re good for your kids too! What spinach offers: Rich in iron for strong blood High in vitamin C for immune support Contains fiber for digestion Packed with antioxidants Combined with cheese and eggs, it’s a balanced, protein-rich snack. Common Questions About Spinach Balls Can I use fresh spinach? Yes! Steam, chop, and squeeze out all the moisture. Can I fry the spinach balls? Yes, but baking or air-frying is healthier. Are they good for toddlers? Yes. Just keep the texture soft and avoid spicy add-ins. Can I add meat? Absolutely! Try minced chicken or turkey. How long do they last in the fridge? Up to 4 days in a sealed container. Can I pack them in school lunchboxes? Definitely! They stay good at room temp for a few hours. When to Serve Spinach Balls These spinach balls are great for almost any occasion: After-school snacks Lunchbox additions Appetizers at parties Picnic food Healthy dinner side dish Fun movie night finger food Perfect for any time your child is hungry—and picky. Why This Recipe Works This recipe is kid-tested and parent-approved because: It uses simple, healthy ingredients It’s quick and easy to prepare It turns spinach into something fun and tasty It works every single time If you’re wondering how to make spinach balls that kids will love, this method is the one to try. Final Thoughts Getting kids to eat veggies can be tough. But not when you turn them into something fun. These spinach balls prove that healthy food can be exciting, tasty, and totally kid-approved. In just a few steps, you’ll have a snack the whole family will enjoy. They’re perfect for busy weekdays, lunchboxes, or parties. Now that you know how to make spinach balls that kids will love, grab your ingredients and get cooking! Don’t Forget: Share this recipe with other parents Pin it on Pinterest for later Comment below with your favorite variation Tag us if you try it—we’d love to see your results!

How to Make Spinach Balls That Kids Will Love Read More »

Scroll to Top