Side Dishes

Top Recipes with Teff Flour That Taste Absolutely Amazing

Top Recipes with Teff Flour That Taste Absolutely Amazing

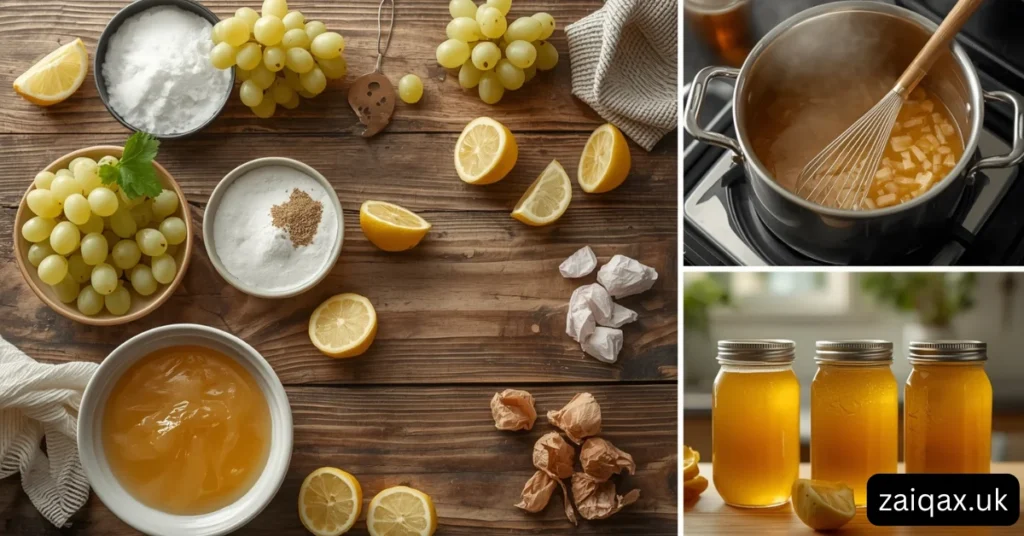
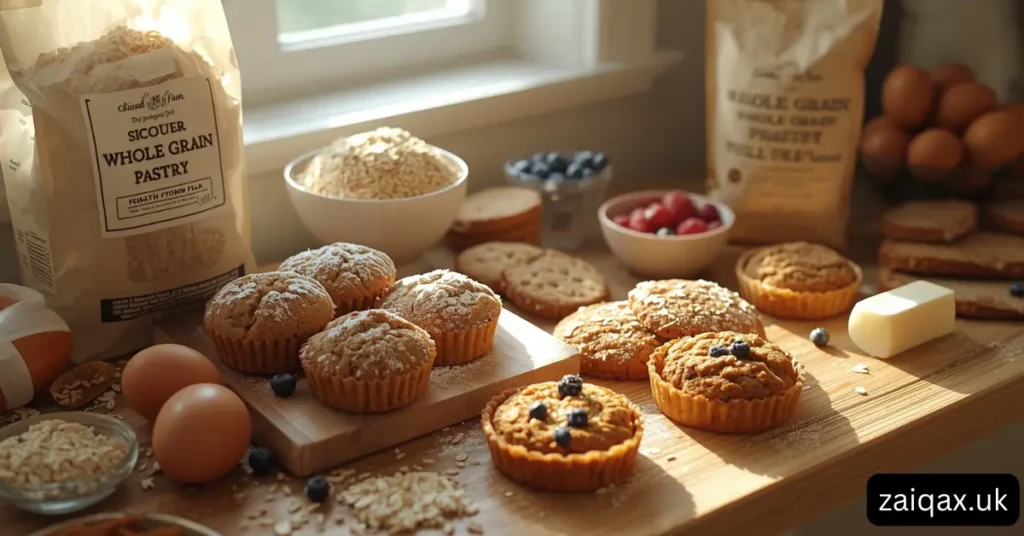
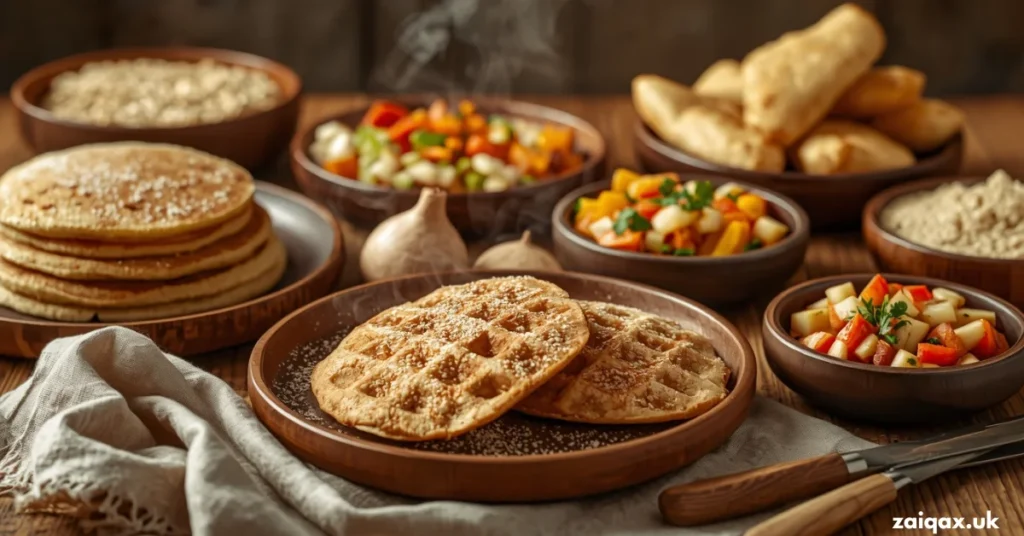
If you are searching for healthy, unique, and delicious ways to upgrade your cooking, then exploring top recipes with teff flour that taste absolutely amazing is a perfect place to start. Teff flour may not be as common as wheat or rice flour, but once you try it, you’ll understand why it’s gaining popularity around the world. Teff is a tiny ancient grain packed with nutrients, flavor, and versatility. Whether you want to bake soft bread, fluffy pancakes, or rich desserts, teff flour can do it all. The best part? It adds a slightly nutty, earthy taste that makes every recipe feel special. In this complete guide, you’ll discover everything you need to know about teff flour along with some of the most delicious recipes you can easily make at home. What Is Teff Flour? Teff flour is made from teff, one of the smallest grains in the world. It has been used for thousands of years, especially in Ethiopian cooking. The grain is naturally gluten-free, making it an excellent option for people with gluten sensitivity. Teff flour comes in two main types: Ivory teff – mild flavor, lighter color Brown teff – richer flavor, darker color Both types are nutritious and work well in a variety of recipes. Why Use Teff Flour in Recipes? Before jumping into the recipes, let’s quickly look at why teff flour deserves a place in your kitchen. 1. Naturally Gluten-Free Perfect for those avoiding gluten but still wanting delicious baked goods. 2. Rich in Nutrients Teff is high in fiber, iron, calcium, and protein. 3. Unique Flavor It adds a mild nutty taste that enhances both sweet and savory dishes. 4. Versatile You can use it in bread, pancakes, cookies, cakes, and even porridge. Tips for Cooking with Teff Flour Teff flour behaves a bit differently than regular flour, so keep these simple tips in mind: Mix it with other flours for lighter texture Add extra moisture to prevent dryness Use eggs or binding agents in baking Let batters rest for better consistency Top Recipes with Teff Flour That Taste Absolutely Amazing Now let’s explore the best recipes you can try today. 1. Teff Flour Pancakes (Soft and Fluffy) These pancakes are one of the easiest ways to start using teff flour. Ingredients: 1 cup teff flour 1/2 cup all-purpose or gluten-free flour 1 tbsp sugar 1 tsp baking powder 1 egg 1 cup milk 1 tsp vanilla extract Instructions: Mix dry ingredients in a bowl Add egg, milk, and vanilla Stir until smooth Cook on a hot pan until bubbles form Flip and cook until golden Why You’ll Love It: They are soft, slightly nutty, and perfect with honey or syrup. 2. Traditional Teff Injera (Authentic Flatbread) Injera is a famous Ethiopian flatbread made primarily from teff flour. Ingredients: 2 cups teff flour 3 cups water Pinch of salt Instructions: Mix teff flour and water Let ferment for 1–2 days Pour batter into a pan like a pancake Cook without flipping Why It’s Amazing: It has a unique sour flavor and spongy texture that pairs perfectly with stews. 3. Teff Banana Bread (Moist and Healthy) A delicious twist on classic banana bread. Ingredients: 1 cup teff flour 1/2 cup almond flour 2 ripe bananas 2 eggs 1/3 cup honey 1 tsp baking soda Instructions: Mash bananas Mix all ingredients Pour into baking pan Bake at 180°C for 40–45 minutes Why It’s Amazing: Moist, naturally sweet, and full of flavor. 4. Teff Chocolate Cake (Rich and Decadent) Perfect for dessert lovers. Ingredients: 1 cup teff flour 1/2 cup cocoa powder 3/4 cup sugar 2 eggs 1 cup milk 1 tsp baking powder Instructions: Mix dry ingredients Add wet ingredients Pour into pan Bake for 30–35 minutes Why You’ll Love It: Deep chocolate flavor with a unique earthy touch. 5. Teff Cookies (Crispy Outside, Soft Inside) Simple and quick snack option. Ingredients: 1 cup teff flour 1/2 cup butter 1/2 cup sugar 1 egg 1 tsp vanilla Instructions: Cream butter and sugar Add egg and vanilla Mix in teff flour Bake at 175°C for 12–15 minutes Why It’s Amazing: Perfect balance of crisp and chewy texture. 6. Teff Porridge (Healthy Breakfast) A warm, nutritious start to your day. Ingredients: 1/2 cup teff flour 2 cups water or milk Honey or sugar Instructions: Cook teff flour with liquid Stir continuously Cook until thick Add sweetener Why It’s Amazing: Comforting, filling, and packed with nutrients. 7.Teff Pizza Base (Gluten-Free Option) A great alternative to traditional pizza crust. Ingredients: 1 cup teff flour 1/2 cup tapioca flour 1 tsp yeast 1 cup warm water Instructions: Mix all ingredients Let dough rise Shape into crust Bake before adding toppings Why You’ll Love It: Crispy edges with a soft center. Teff Muffins (Light and Flavorful) Great for snacks or breakfast. Ingredients: 1 cup teff flour 1/2 cup sugar 1 egg 1/2 cup milk 1 tsp baking powder Instructions: Mix ingredients Pour into muffin cups Bake at 180°C for 20–25 minutes Why It’s Amazing: Light, fluffy, and easy to customize. 9. Teff Waffles (Crispy and Golden) Perfect weekend breakfast idea. Ingredients: 1 cup teff flour 1 egg 1 cup milk 1 tbsp oil Instructions: Mix batter Pour into waffle maker Cook until crispy Why You’ll Love It: Crunchy outside, soft inside. 10. Teff Brownies (Fudgy and Delicious) A must-try dessert. Ingredients: 1 cup teff flour 1/2 cup cocoa powder 1/2 cup butter 2 eggs 3/4 cup sugar Instructions: Melt butter Mix all ingredients Bake for 25–30 minutes Why It’s Amazing: Rich, fudgy, and gluten-free. Common Mistakes to Avoid Even though teff flour is easy to use, beginners often make a few mistakes: Using it alone in every recipe (mixing works better) Not adding enough moisture Overbaking (can make it dry) Skipping resting time for batter How to Store Teff Flour To keep your teff flour fresh: Store in an airtight container Keep in a cool, dry place Refrigerate for longer shelf life Final Thoughts Exploring top recipes with teff flour

Top Recipes with Teff Flour That Taste Absolutely Amazing Read More »

Easy Habanero Chicken Recipe Spicy Juicy Secret

Easy Habanero Chicken Recipe Spicy Juicy Secret

If you love bold flavors, a little heat, and juicy, tender chicken, then this Easy Habanero Chicken Recipe Spicy Juicy Secret is exactly what your kitchen needs. This recipe combines the fiery kick of habanero peppers with a perfectly balanced marinade that keeps the chicken incredibly moist and flavorful. Whether you are cooking for a weeknight dinner or trying to impress guests, this dish delivers restaurant-quality results with simple ingredients and easy steps. In this complete guide, you will learn everything from selecting the right ingredients to mastering the secret techniques that make this recipe truly special. Even if you are not used to cooking spicy food, don’t worry—the instructions are beginner-friendly and easy to follow. What Makes This Habanero Chicken Recipe Special This is not just another spicy chicken recipe. The magic lies in the balance of heat, flavor, and texture. Many spicy dishes focus only on heat, but this recipe ensures that every bite is flavorful, juicy, and satisfying. Here’s what makes it stand out: Perfect Heat Balance – Habanero peppers bring spice, but the marinade tones it down with sweetness and acidity Juicy Texture – Proper marination locks in moisture Simple Ingredients – No complicated or hard-to-find items Quick Preparation – Easy enough for beginners Versatile Cooking Methods – Grill, bake, or pan-fry Understanding Habanero Peppers Habanero peppers are known for their intense heat, but they also have a unique fruity flavor that sets them apart from other chilies. When used correctly, they add depth and richness to the dish rather than just burning heat. Heat Level Habaneros are significantly hotter than jalapeños, so a little goes a long way. Flavor Profile Fruity Slightly citrusy Bright and aromatic Tips for Handling Always wash your hands after handling Avoid touching your eyes Use gloves if you are sensitive to spice Ingredients You Will Need To make this Easy Habanero Chicken Recipe Spicy Juicy Secret, you only need simple pantry ingredients. Main Ingredients 500g chicken (boneless or bone-in) 2 fresh habanero peppers 3 cloves garlic 2 tablespoons olive oil 1 tablespoon lemon juice 1 tablespoon honey 1 teaspoon paprika 1 teaspoon salt ½ teaspoon black pepper 1 teaspoon soy sauce (optional for umami) Optional Additions Onion powder Chili flakes for extra heat Fresh herbs like cilantro or parsley Step-by-Step Cooking Instructions Step 1: Prepare the Marinade Start by blending or finely chopping the habanero peppers and garlic. Mix them with olive oil, lemon juice, honey, paprika, salt, and pepper. This marinade is the heart of the recipe. It creates a perfect balance between spicy, tangy, and slightly sweet flavors. Step 2: Marinate the Chicken Place the chicken in a bowl and coat it thoroughly with the marinade. Cover and refrigerate for at least 30 minutes For best results, marinate for 4–6 hours This step ensures the chicken absorbs all the flavors deeply. Step 3: Choose Your Cooking Method Pan-Frying Heat a pan with a little oil Cook chicken on medium heat for 6–8 minutes per side Ensure it is cooked through Baking Preheat oven to 200°C (400°F) Place chicken on a baking tray Bake for 25–30 minutes Grilling Preheat grill Cook chicken for 10–12 minutes, turning occasionally Step 4: Rest Before Serving Let the chicken rest for 5 minutes after cooking. This helps retain juices and keeps it tender. The Secret to Juicy Habanero Chicken Many people struggle with dry chicken, especially when cooking spicy dishes. Here are the secrets to keeping it juicy: 1. Proper Marination Marinating for longer allows the chicken to absorb moisture and flavor. 2. Do Not Overcook Overcooking is the main reason chicken becomes dry. Always monitor cooking time. 3. Use Oil in Marinade Oil helps lock in moisture and prevents drying. 4. Resting Time Letting the chicken rest redistributes the juices. Adjusting the Spice Level Not everyone can handle extreme heat, and that’s completely fine. This recipe is flexible. To Reduce Heat Remove seeds from habanero Use only one pepper Add more honey To Increase Heat Add extra habanero Include chili flakes Use spicy sauce Best Side Dishes for Habanero Chicken This dish pairs well with a variety of sides that balance the heat. Mild and Cooling Options Rice Yogurt dip Fresh salad Flavorful Pairings Garlic bread Roasted vegetables Mashed potatoes Healthy Choices Steamed vegetables Quinoa Brown rice Variations of This Recipe One of the best things about this Easy Habanero Chicken Recipe Spicy Juicy Secret is how easily you can customize it. Honey Habanero Chicken Add extra honey for a sweet-spicy flavor. Creamy Habanero Chicken Mix in cream or yogurt to reduce heat and add richness. Crispy Habanero Chicken Coat chicken lightly in flour or breadcrumbs before cooking. Grilled Smoky Version Add a bit of smoked paprika for a smoky flavor. Common Mistakes to Avoid Even simple recipes can go wrong if you overlook small details. Using Too Many Habaneros This can make the dish overpoweringly spicy. Skipping Marination You will lose depth of flavor and juiciness. Cooking on High Heat Only This can burn the outside while leaving the inside undercooked. Not Tasting the Marinade Always adjust seasoning before adding chicken. Nutritional Benefits This recipe is not only delicious but also nutritious. Chicken High in protein Supports muscle growth Habanero Peppers Rich in vitamins A and C Boost metabolism Garlic Supports immunity Adds natural flavor Storage and Reheating Tips Storing Keep in an airtight container Refrigerate for up to 3 days Freezing Freeze cooked chicken for up to 2 months Reheating Use a pan for best results Avoid microwaving too long to prevent dryness Perfect Occasions for This Recipe This dish fits many occasions and moods. Family dinners Weekend meals BBQ parties Meal prep Its bold flavor makes it a crowd-pleaser. Final Thoughts This Easy Habanero Chicken Recipe Spicy Juicy Secret is a perfect example of how simple ingredients can create bold and unforgettable flavors. It is easy enough for beginners yet impressive enough for special occasions. The key is balance—balancing heat with sweetness, spice with acidity, and flavor with

Easy Habanero Chicken Recipe Spicy Juicy Secret Read More »

Perfect Egg Salad Recipe with Dill Pickles Secret

Perfect Egg Salad Recipe with Dill Pickles Secret

If you are looking for a creamy, tangy, and absolutely satisfying dish, then this Perfect Egg Salad Recipe with Dill Pickles Secret is exactly what you need. This recipe is simple, quick, and packed with flavor. Whether you want a quick lunch, a picnic favorite, or a tasty sandwich filling, egg salad never disappoints. But what makes this version special? The secret lies in one powerful ingredient — dill pickles. They add a crunchy texture and a tangy kick that transforms a basic egg salad into something unforgettable. In this complete guide, you will learn everything — from ingredients to tips, variations, mistakes to avoid, and serving ideas — all explained in an easy and practical way. Why This Egg Salad Recipe is Special Egg salad is a classic dish, but not all egg salads taste the same. Many people complain that their egg salad turns out bland, too dry, or overly mushy. This recipe solves all those problems because: It has the perfect creamy texture It balances tangy, savory, and slightly sweet flavors It includes a crunchy element (dill pickles) It uses simple ingredients available at home It is quick and beginner-friendly Ingredients for Perfect Egg Salad To make the best egg salad, you don’t need fancy ingredients. Just a few fresh items can create magic. Main Ingredients 6 large eggs 3 tablespoons mayonnaise 2 tablespoons finely chopped dill pickles 1 teaspoon Dijon mustard 1 tablespoon pickle juice (secret ingredient) 2 tablespoons finely chopped onion (optional) 1 tablespoon chopped fresh dill (optional but recommended) Salt to taste Black pepper to taste Why Dill Pickles Are the Secret Ingredient Dill pickles are what make this recipe stand out. Here’s why they are important: They add a tangy flavor that balances the richness of eggs They provide a crunchy texture The pickle juice enhances overall taste They make the salad more refreshing and less heavy Without dill pickles, egg salad can taste plain. With them, it becomes exciting and addictive. Step-by-Step Instructions Follow these simple steps to make perfect egg salad every time. Step 1: Boil the Eggs Place eggs in a saucepan Cover with water Bring to a boil Once boiling, cook for 10–12 minutes Step 2: Cool the Eggs Transfer eggs to cold water or ice bath Let them cool completely This helps in easy peeling Step 3: Peel and Chop Peel the eggs carefully Chop them into small pieces You can mash slightly if you prefer creamy texture Step 4: Prepare the Dressing In a bowl, mix: Mayonnaise Mustard Pickle juice Salt and pepper Step 5: Combine Everything Add chopped eggs to the bowl Add dill pickles, onion, and fresh dill Mix gently until combined Step 6: Taste and Adjust Add more salt, pepper, or pickle juice if needed Step 7: Chill Before Serving Refrigerate for 30 minutes for best flavor Tips for Perfect Egg Salad These tips will help you make your egg salad even better: Use Fresh Eggs Fresh eggs taste better and give a creamy texture. Don’t Overcook Eggs Overcooked eggs become rubbery and develop a green ring. Chop Evenly Uniform pieces give better texture and presentation. Balance Creaminess Too much mayonnaise can make it heavy. Use just enough. Add Pickle Juice Slowly Start with a small amount and adjust to taste. Common Mistakes to Avoid Avoid these mistakes to get the perfect result: 1. Using Too Much Mayo This makes the salad greasy and heavy. 2. Not Adding Enough Seasoning Eggs are bland, so seasoning is important. 3. Skipping the Pickles Without them, the salad lacks flavor and texture. 4. Overmixing This can turn your egg salad into a paste. 5. Serving Immediately Letting it chill enhances the taste. Delicious Variations of Egg Salad You can customize this recipe in many ways. 1. Spicy Egg Salad Add chili flakes or hot sauce 2. Healthy Version Replace mayo with Greek yogurt 3. Avocado Egg Salad Mix in mashed avocado for creaminess 4. Crunchy Veggie Version Add celery, carrots, or bell peppers 5. Protein Boost Add shredded chicken or tuna Best Ways to Serve Egg Salad Egg salad is versatile and can be served in many ways: Sandwich Spread between bread slices for a classic meal. Wrap Use tortilla wraps for a quick lunch. Salad Bowl Serve over lettuce for a low-carb option. Toast Top on toasted bread for a crunchy bite. Crackers Serve as a snack or appetizer. Nutritional Benefits of Egg Salad Egg salad is not only tasty but also nutritious. Rich in Protein Eggs provide high-quality protein for muscle health. Healthy Fats Mayonnaise and eggs contain healthy fats for energy. Vitamins and Minerals Eggs are rich in: Vitamin B12 Vitamin D Selenium Low Carb Option Perfect for low-carb and keto diets. How to Store Egg Salad Proper storage keeps your egg salad fresh and safe. Refrigeration Store in an airtight container Keep in the fridge for up to 3 days Avoid Freezing Freezing ruins texture and taste. Keep It Cool Do not leave egg salad at room temperature for long. Make-Ahead Tips Egg salad is great for meal prep. Boil eggs in advance Store dressing separately Mix before serving for freshness When to Serve Egg Salad This dish is perfect for many occasions: Quick lunch Picnic Family gatherings Light dinner Party appetizer Why This Recipe Works Every Time This recipe is reliable because it focuses on: Balanced flavors Proper texture Simple ingredients Easy method The addition of dill pickles ensures that every bite is flavorful and refreshing. Final Thoughts This Perfect Egg Salad Recipe with Dill Pickles Secret is simple yet incredibly delicious. It turns a basic dish into something special with just one key ingredient — dill pickles. The combination of creamy eggs, tangy pickles, and balanced seasoning creates a flavor that is hard to resist. Whether you are a beginner or an experienced cook, this recipe is easy to follow and guarantees great results. Try it once, and it will quickly become your go-to egg salad recipe. Frequently Asked Questions 

Perfect Egg Salad Recipe with Dill Pickles Secret Read More »

10 Best Angelfish Recipes You Have to Try Today

10 Best Angelfish Recipes You Have to Try Today

If you love seafood and want to try something unique, angelfish is a must-have on your plate. Known for its delicate flavor and tender texture, angelfish can be cooked in many ways—from quick pan-frying to gourmet baking. In this article, we’ll explore the 10 best angelfish recipes you have to try today. Each recipe is simple, delicious, and perfect for seafood lovers. Whether you are a beginner cook or a seasoned chef, these recipes will help you discover the versatility of angelfish. Let’s dive in! 1. Pan-Seared Angelfish with Lemon Butter Why you should try it: Pan-searing angelfish keeps the fish moist and flaky while giving it a golden crust. The lemon butter adds a zesty and rich flavor. Ingredients: 2 angelfish fillets 2 tablespoons butter 1 tablespoon olive oil 1 clove garlic, minced Juice of 1 lemon Salt and pepper to taste Fresh parsley for garnish Instructions: Heat olive oil and 1 tablespoon butter in a pan over medium heat. Season the fillets with salt and pepper. Place the fillets in the pan and cook for 3-4 minutes per side until golden. Add garlic and the remaining butter, cooking for 1 more minute. Squeeze lemon juice over the fish and garnish with parsley. Serve immediately with steamed vegetables or rice. Pro tip: Don’t overcook the angelfish; it cooks quickly and is best served moist. 2. Baked Angelfish with Garlic and Herbs Baking angelfish is an effortless way to prepare a healthy, flavorful meal. The garlic and fresh herbs enhance its natural taste. Ingredients: 2 angelfish fillets 2 tablespoons olive oil 2 cloves garlic, minced 1 teaspoon dried thyme 1 teaspoon rosemary Salt and pepper to taste Lemon slices Instructions: Preheat your oven to 375°F (190°C). Place fillets on a baking sheet lined with parchment paper. Mix olive oil, garlic, thyme, and rosemary. Brush this mixture over the fish. Season with salt and pepper and top with lemon slices. Bake for 15-20 minutes until the fish flakes easily. This recipe is perfect for a light dinner or a healthy lunch. 3. Angelfish Curry If you enjoy spicy dishes, angelfish curry is a flavorful and aromatic choice. The tender fish absorbs the spices beautifully. Ingredients: 500g angelfish fillets, cut into pieces 1 large onion, finely chopped 2 tomatoes, pureed 1 teaspoon ginger-garlic paste 1 teaspoon turmeric 1 teaspoon chili powder 1 teaspoon cumin powder 1 cup coconut milk Salt to taste Fresh coriander leaves Instructions: Heat oil in a pan and sauté onions until golden. Add ginger-garlic paste and cook for 1 minute. Add turmeric, chili, and cumin powders. Stir well. Pour in tomato puree and cook until oil separates. Add coconut milk and bring to a simmer. Gently add angelfish pieces and cook for 5-7 minutes. Garnish with fresh coriander and serve with steamed rice. Tip: Coconut milk gives a creamy texture without overpowering the delicate fish flavor. 4. Grilled Angelfish with Herbs Grilling angelfish is ideal for summer barbecues. The smoky flavor enhances its natural sweetness. Ingredients: 2 angelfish fillets 2 tablespoons olive oil 1 teaspoon paprika 1 teaspoon garlic powder 1 teaspoon lemon zest Salt and pepper to taste Instructions: Preheat the grill to medium-high heat. Mix olive oil, paprika, garlic powder, lemon zest, salt, and pepper. Brush the mixture onto the fish fillets. Grill for 3-4 minutes per side until grill marks appear. Serve with grilled vegetables or a fresh salad. Pro tip: Use a fish basket to prevent the delicate fillets from falling apart on the grill. 5. Angelfish in Tomato Sauce This recipe is a comforting dish reminiscent of home-cooked meals. The tomato sauce adds tanginess and depth. Ingredients: 2 angelfish fillets 2 tablespoons olive oil 1 onion, chopped 2 cloves garlic, minced 1 can crushed tomatoes 1 teaspoon oregano Salt and pepper to taste Fresh basil for garnish Instructions: Heat olive oil in a pan and sauté onion and garlic until soft. Add crushed tomatoes and oregano, simmer for 10 minutes. Gently add angelfish fillets and cook for 6-8 minutes. Season with salt and pepper, garnish with basil, and serve with bread or pasta. 6. Spicy Angelfish Tacos Tacos aren’t just for beef or chicken; angelfish makes a light, flavorful filling. The spice blend and toppings make it irresistible. Ingredients: 2 angelfish fillets 1 teaspoon chili powder 1 teaspoon cumin 1 teaspoon paprika Salt and pepper Corn tortillas Fresh cabbage, shredded Salsa and avocado slices Instructions: Season fish with chili powder, cumin, paprika, salt, and pepper. Pan-fry fillets for 3-4 minutes per side until cooked. Warm corn tortillas and assemble with fish, cabbage, salsa, and avocado. Serve with lime wedges. Tip: For extra flavor, marinate fish in lime juice and spices for 15 minutes before cooking. 7. Angelfish with Coconut Rice Pairing angelfish with coconut rice brings out its mild, buttery taste. This combination is creamy, fragrant, and satisfying. Ingredients for Fish: 2 angelfish fillets 2 tablespoons olive oil 1 teaspoon turmeric 1 teaspoon salt Ingredients for Coconut Rice: 1 cup rice 1 cup coconut milk 1 cup water 1 teaspoon salt Instructions: Cook rice with coconut milk, water, and salt until tender. Season fish with turmeric and salt, pan-fry until golden. Serve fillets over coconut rice with a sprinkle of fresh parsley. 8. Angelfish Stir-Fry A quick and healthy option, stir-fried angelfish pairs well with vegetables and Asian-inspired sauces. Ingredients: 2 angelfish fillets, cubed 1 cup bell peppers, sliced 1 carrot, julienned 2 tablespoons soy sauce 1 tablespoon sesame oil 1 teaspoon ginger, grated 1 clove garlic, minced Instructions: Heat sesame oil in a wok. Add garlic and ginger. Add angelfish cubes and stir-fry for 2-3 minutes. Toss in vegetables and soy sauce, cooking until vegetables are tender-crisp. Serve with steamed rice or noodles. Tip: High heat is key to a quick, flavorful stir-fry without overcooking the fish. 9. Angelfish Soup Angelfish makes a light and comforting soup. Perfect for cold days or a healthy appetizer. Ingredients: 2 angelfish fillets, cut into pieces 1 liter fish stock or water 1 onion, chopped

10 Best Angelfish Recipes You Have to Try Today Read More »

Proven White Beans Crock Pot Recipe That Tastes Amazing

Proven White Beans Crock Pot Recipe That Tastes Amazing

If you love comfort food that warms the soul, there’s nothing better than a hearty bowl of white beans. The beauty of white beans lies not only in their creamy texture and mild flavor but also in their versatility. Today, we’re diving into a Proven White Beans Crock Pot Recipe That Tastes Amazing, a dish that’s simple, flavorful, and perfect for busy days. Whether you’re cooking for a family dinner, prepping meals for the week, or looking for a healthy, satisfying side, this recipe will quickly become a favorite. Using a crock pot makes cooking effortless, as it allows the beans to simmer slowly, absorbing all the flavors without constant attention. Why White Beans Are a Kitchen Staple White beans, also known as navy beans, cannellini beans, or great northern beans, are a staple in many kitchens. They are not just delicious but also packed with nutrients: High in Protein: Ideal for vegetarians and anyone looking to increase their protein intake. Rich in Fiber: Supports digestion and keeps you feeling full. Low in Fat: Perfect for heart-healthy diets. Versatile Flavor: Their mild taste absorbs spices and seasonings beautifully. This recipe takes full advantage of these benefits while providing a comforting, flavorful dish you can enjoy any time. Ingredients for the Perfect Crock Pot White Beans Before you start, make sure you have the following ingredients. They are simple, easy to find, and work together to make the Proven White Beans Crock Pot Recipe That Tastes Amazing. 1 pound dried white beans (navy beans or great northern beans work best) 6 cups water or low-sodium broth for added flavor 1 medium onion, finely chopped 2–3 cloves garlic, minced 2 carrots, diced 2 celery stalks, diced 1 teaspoon smoked paprika 1 teaspoon dried thyme 1 teaspoon salt (adjust to taste) ½ teaspoon black pepper 2 bay leaves Optional: 1 smoked ham hock or bacon for added depth of flavor The secret to a truly amazing crock pot white beans recipe is balancing simple aromatics with a slow-cooking process that allows the flavors to meld. Step-by-Step Instructions for the Crock Pot White Beans Cooking white beans in a crock pot couldn’t be easier. Follow these simple steps for a delicious outcome. Step 1: Prepare the Beans Start by sorting through your beans to remove any debris or small stones. Rinse them thoroughly under cold water. For best results, soak the beans overnight in water. If you’re short on time, use the quick soak method: boil the beans for 2 minutes, then let them sit covered for 1 hour before draining. Step 2: Add Ingredients to the Crock Pot Once the beans are prepped, place them in the crock pot along with the onion, garlic, carrots, celery, and bay leaves. Add smoked paprika, thyme, salt, and black pepper. If you’re using a ham hock or bacon, place it on top. Finally, pour in the water or broth until the beans are fully submerged. Step 3: Slow Cook Set your crock pot to low heat and cook for 7–8 hours, or until the beans are tender and creamy. If you’re short on time, cooking on high heat for 4–5 hours works too, but low and slow cooking develops more flavor. Step 4: Finish and Serve Remove the bay leaves and any meat if used. Taste and adjust seasoning as needed. For a creamier texture, mash a few beans with the back of a spoon and stir them back into the pot. Serve warm with cornbread, rice, or enjoy on its own. Tips for Making the Best Crock Pot White Beans Even though this is a straightforward recipe, a few tips can elevate it from good to amazing: Soak Your Beans: Soaking reduces cooking time and improves digestibility. Don’t Skip the Aromatics: Onion, garlic, celery, and carrots bring natural sweetness and depth. Use Broth for More Flavor: Water works, but low-sodium chicken or vegetable broth intensifies the taste. Season Gradually: Beans absorb flavors over time. Taste toward the end before adjusting salt. Add Acid Last: A splash of lemon juice or vinegar at the end brightens the dish without toughening the beans. Enhance Texture: For extra creaminess, stir in a tablespoon of butter or olive oil just before serving. Variations of This Proven White Beans Crock Pot Recipe The beauty of white beans is how adaptable they are. Here are a few delicious variations: 1. Vegetarian Version Skip the meat and add extra vegetables like zucchini, bell peppers, or spinach. Use vegetable broth instead of water for more flavor. 2. Spicy Kick Add a pinch of cayenne pepper, red pepper flakes, or a dash of hot sauce for a warming, spicy version. 3. Mediterranean Twist Incorporate sun-dried tomatoes, olives, and a sprinkle of oregano. Finish with a drizzle of olive oil before serving. 4. Smoky Flavor Smoked paprika, chipotle powder, or a smoked ham hock can provide that rich, smoky taste that makes this dish irresistible. Serving Ideas for White Beans Once your Proven White Beans Crock Pot Recipe That Tastes Amazing is ready, you’ll want to enjoy it in multiple ways: As a Side Dish: Perfect alongside roasted chicken, pork, or grilled vegetables. Over Rice or Quinoa: Makes a complete, nutritious meal. In Soups or Stews: Use leftovers to create a creamy bean soup or a hearty vegetable stew. With Bread: Serve with cornbread, crusty bread, or garlic toast for dipping. Health Benefits of White Beans White beans aren’t just delicious—they’re also a powerhouse of nutrition: Supports Heart Health: High fiber and low fat help reduce cholesterol levels. Stabilizes Blood Sugar: The fiber and protein content slows digestion and prevents spikes. Rich in Iron and Folate: Supports energy production and red blood cell formation. Promotes Weight Management: High fiber content keeps you full longer, reducing overeating. Including white beans in your diet, especially in a slow-cooked recipe like this, is an easy way to combine taste and nutrition. Common Mistakes to Avoid Even a simple recipe can go wrong if you’re not careful. Here’s

Proven White Beans Crock Pot Recipe That Tastes Amazing Read More »

Secret Southern White Beans Recipe Everyone Loves

Secret Southern White Beans Recipe Everyone Loves

Southern cuisine is renowned for its comforting flavors, slow-cooked meals, and family-style recipes passed down through generations. Among these cherished dishes, Southern white beans stand out as a classic favorite. Creamy, flavorful, and satisfying, they are a staple on Southern tables and a dish that brings people together. In this article, we’ll explore the secret Southern white beans recipe everyone loves, along with tips, variations, and techniques to make your beans the star of any meal. The Charm of Southern White Beans White beans, also called navy beans, cannellini beans, or Great Northern beans depending on size and region, have been a Southern kitchen staple for centuries. Their mild flavor and creamy texture make them versatile for both side dishes and main courses. In Southern kitchens, white beans are more than just food—they are a comfort, a tradition, and a symbol of home-cooked goodness. The secret to perfect beans isn’t just the ingredients but also the love and care put into cooking them slowly over time. Ingredients That Make Southern White Beans Irresistible The secret Southern white beans recipe everyone loves relies on a combination of simple ingredients that build deep flavor. Here’s what you’ll need: White beans – 1 pound (navy, Great Northern, or cannellini) Smoked ham hock or bacon – 1-2 pieces for authentic Southern flavor Onion – 1 medium, finely chopped Garlic – 3-4 cloves, minced Celery – 2 stalks, diced Carrots – 2 medium, diced Chicken or vegetable broth – 4 cups (for a richer flavor) Bay leaves – 2 Fresh thyme – 1 tsp Salt and black pepper – to taste Apple cider vinegar – 1 tsp (optional, enhances flavor) Hot sauce – optional, for those who like a kick These ingredients may seem simple, but together they create layers of flavor that elevate humble white beans into a dish everyone loves. Step-by-Step Guide to the Secret Southern White Beans The beauty of Southern cooking lies in patience and attention to detail. Here’s how to make the ultimate Southern white beans: Step 1: Preparing the Beans Start by rinsing the beans under cold water to remove any dirt or debris. Then, soak the beans overnight in cold water. If you’re short on time, you can use the quick-soak method: Place beans in a pot and cover with 2 inches of water. Bring to a boil for 2 minutes. Turn off heat and let the beans soak for 1 hour. Soaking helps the beans cook evenly, reduces cooking time, and makes them easier to digest. Step 2: Cooking the Flavor Base While beans are soaking, prepare the flavor base, also called a “sofrito” in some Southern kitchens: Heat a large pot over medium heat. Add chopped bacon or ham hock and cook until slightly crispy. Remove meat temporarily and sauté onions, garlic, celery, and carrots in the rendered fat until soft. This base gives your beans a deep, smoky, and aromatic flavor—one of the secrets to why this recipe is loved by everyone. Step 3: Simmering the Beans Drain the soaked beans and add them to the pot with the sautéed vegetables. Then: Pour in chicken or vegetable broth until the beans are fully covered. Add bay leaves, thyme, and the cooked ham hock (or bacon). Bring to a gentle boil, then reduce heat to low. Cover and simmer for 1.5 to 2 hours, stirring occasionally. Slow cooking allows the beans to absorb all the flavors, becoming creamy and tender without breaking apart. Step 4: Final Touches After simmering, check the beans for tenderness. Remove bay leaves and ham hock. If using bacon, you can chop it up and return to the beans. Then: Season with salt, black pepper, and a splash of apple cider vinegar for brightness. If desired, add a few dashes of hot sauce for a subtle kick. Serve warm with cornbread, collard greens, or over rice for a true Southern feast. Tips for Making Southern White Beans Perfect Every Time Don’t rush the cooking – The secret to creamy beans is slow, gentle simmering. High heat can break the beans and make them mushy. Season gradually – Add salt near the end of cooking to prevent beans from toughening. Use smoked meat wisely – Ham hock, bacon, or smoked sausage enhances flavor without overpowering the beans. Try different beans – While navy beans are traditional, Great Northern or cannellini beans also work beautifully. Add fresh herbs – Thyme, parsley, or a bay leaf enhances the aroma and flavor naturally. Secret Variations That Everyone Loves Southern white beans are versatile. Once you master the classic recipe, experiment with these variations: 1. Spicy Southern Beans Add chopped jalapeños, cayenne pepper, or hot sauce to give your beans a gentle Southern heat. 2. Vegetarian Southern Beans Skip the meat and use smoked paprika or liquid smoke for that rich, smoky flavor. Use vegetable broth instead of chicken broth. 3. Creamy Beans Mash a portion of the cooked beans and stir back into the pot for an extra creamy texture, perfect for spreading on bread or serving with rice. 4. Bean and Greens Combo Stir in collard greens, kale, or mustard greens for a hearty, fiber-rich one-pot meal. 5. Beans with Cornbread Crumble Serve your beans with crumbled cornbread on top, a Southern twist that adds texture and sweetness. Why Southern White Beans Are a Crowd-Pleaser There’s a reason Southern white beans have stood the test of time: Comforting and hearty – They warm both stomach and soul. Budget-friendly – Beans are affordable yet nutritious. Versatile – Serve them as a side, main dish, or even in soups and stews. Flavorful – The combination of smoked meat, aromatics, and slow cooking creates a deep, rich taste. Family-friendly – Mild flavor appeals to children and adults alike, making it a dish everyone loves. Pairing Southern White Beans with Classic Sides To elevate your Southern beans to a full meal, consider pairing them with these traditional sides: Cornbread – Sweet, buttery, and slightly crumbly. Collard Greens –

Secret Southern White Beans Recipe Everyone Loves Read More »

Famous White Chicken Chili Recipe Cheesecake Factory – Creamy, Comforting, and Easy to Make at Home

Famous White Chicken Chili Recipe Cheesecake Factory – Creamy, Comforting, and Easy to Make at Home

If you love rich, creamy soups with bold flavor, the Famous White Chicken Chili Recipe Cheesecake Factory style is something you must try. Inspired by the comforting flavors served at the popular American restaurant chain The Cheesecake Factory, this white chicken chili is creamy, hearty, and packed with tender chicken, white beans, green chilies, and warm spices. In this complete guide, you will learn: What makes this chili special Ingredients breakdown Step-by-step cooking instructions Pro tips for perfect texture Slow cooker and Instant Pot variations Storage and reheating tips Healthy swaps and customizations Serving ideas and toppings Let’s dive in and recreate this restaurant-style comfort food right in your kitchen. What Is Famous White Chicken Chili Cheesecake Factory Style? Unlike traditional red chili made with tomatoes and beef, white chicken chili is creamy and lighter in color. It uses: Chicken instead of beef White beans instead of kidney beans Green chilies instead of red tomatoes Cream or cheese for richness The version inspired by The Cheesecake Factory is known for its smooth texture, balanced spice, and comforting flavor. It’s not overly spicy but still packed with warmth. Why This White Chicken Chili Is So Popular There are many reasons people search for this recipe: 1. Creamy Texture The soup has a velvety consistency without being too heavy. 2. Perfect Flavor Balance It combines mild heat, savory chicken, creamy broth, and subtle spices. 3. Comfort Food Classic It feels cozy, satisfying, and perfect for cold days. 4. Family-Friendly Not too spicy, making it ideal for kids and adults alike. Ingredients for Famous White Chicken Chili Recipe  Here’s everything you need to make this delicious chili at home. Main Ingredients 2 tablespoons olive oil 1 medium onion, finely chopped 3 cloves garlic, minced 2 cups cooked shredded chicken (rotisserie works great) 2 cans white beans (Great Northern or Cannellini), drained 1 can diced green chilies 4 cups chicken broth 1 teaspoon ground cumin 1 teaspoon chili powder ½ teaspoon paprika ½ teaspoon dried oregano Salt and black pepper to taste 1 cup heavy cream 4 oz cream cheese, softened 1 cup shredded Monterey Jack cheese Optional Toppings Sour cream Fresh cilantro Shredded cheese Tortilla strips Sliced jalapeños Avocado cubes Lime wedges Step-by-Step Famous White Chicken Chili Recipe Step 1: Sauté the Aromatics Heat olive oil in a large pot over medium heat. Add chopped onion and cook until soft and translucent. Add minced garlic and cook for 30 seconds until fragrant. This creates the flavor base of your chili. Step 2: Add Chicken and Beans Stir in shredded chicken and drained white beans. Mix well so the flavors combine. For a creamier texture, mash about ½ cup of beans and return them to the pot. Step 3: Add Spices and Green Chilies Add: Cumin Chili powder Paprika Oregano Salt and pepper Diced green chilies Stir well and cook for 1–2 minutes to release the spice aroma. Step 4: Pour in Broth Add chicken broth and bring the mixture to a gentle simmer. Let it cook for 15–20 minutes so flavors blend beautifully. Step 5: Make It Creamy Lower the heat. Stir in: Heavy cream Softened cream cheese Shredded Monterey Jack cheese Mix until everything melts and the chili becomes smooth and creamy. Simmer for another 5–10 minutes. Step 6: Taste and Adjust Taste your chili and adjust: Add more salt if needed Add extra cumin for warmth Add chili powder for more spice Your Famous White Chicken Chili Recipe Cheesecake Factory style is now ready! What Makes This Recipe Taste Like the Restaurant Version? To get close to the flavor served at The Cheesecake Factory, focus on:  Creamy Texture Use both heavy cream and cream cheese.  Balanced Seasoning Don’t overpower it with spice. It should be flavorful, not fiery.  Quality Chicken Rotisserie chicken adds deeper flavor.  Gentle Simmer Avoid boiling too hard. Slow simmer keeps it smooth. Slow Cooker Version Want an easier method? Try this: Add chicken, beans, onion, garlic, green chilies, spices, and broth to the slow cooker. Cook on LOW for 6 hours or HIGH for 3–4 hours. Stir in cream, cream cheese, and shredded cheese during the last 30 minutes. Perfect for busy days Instant Pot Version Use sauté mode for onion and garlic. Add remaining ingredients except dairy. Pressure cook for 10 minutes. Quick release pressure. Stir in cream and cheese until smooth. Dinner in under 40 minutes! Healthy Variations If you want a lighter version of Famous White Chicken Chili Recipe Cheesecake Factory style, try these swaps: Use Greek yogurt instead of heavy cream Use reduced-fat cream cheese Add extra beans for protein Use low-sodium broth Add spinach or zucchini for more vegetables You still get an amazing flavor with fewer calories. Flavor Variations 1. Spicy Version Add diced jalapeños or cayenne pepper. 2. Smoky Version Add smoked paprika or a pinch of chipotle powder. 3. Extra Cheesy Mix in white cheddar or pepper jack cheese. 4. Thick and Hearty Blend 1 cup of the chili and return it to the pot. Best Beans for White Chicken Chili The best options are: Great Northern beans Cannellini beans Navy beans They are creamy, mild, and perfect for absorbing flavors. How to Store and Reheat Storage Store in an airtight container in the refrigerator for up to 4 days. Freezing Freeze for up to 3 months. Note: Cream-based soups may slightly change texture after thawing. Reheating Heat slowly on the stovetop. Add a splash of broth or milk if too thick. Serving Suggestions Serve your Famous White Chicken Chili Recipe Cheesecake Factory style with: Warm cornbread Garlic bread Tortilla chips Side salad Steamed rice For a full restaurant-style experience inspired by The Cheesecake Factory, serve in a large bowl with toppings on the side. Nutrition Overview (Approximate Per Serving) Calories: 420–480 Protein: 30g Carbs: 28g Fat: 25g Values vary based on ingredients used. Common Mistakes to Avoid  Boiling Too Hard Can cause dairy to separate.  Adding Cream Too Early Always add at low heat.  Not Seasoning Enough

Famous White Chicken Chili Recipe Cheesecake Factory – Creamy, Comforting, and Easy to Make at Home Read More »

Step-by-Step White Grape Jelly Recipe for Sweet Success

Step-by-Step White Grape Jelly Recipe for Sweet Success

If you’ve ever tasted homemade jelly, you know there’s nothing quite like it. Making your own white grape jelly is not just fun—it’s an experience that rewards you with a sweet, smooth, and flavorful treat. With the right technique and a bit of patience, you can create a jelly that rivals anything in the store. This step-by-step white grape jelly recipe will guide you from selecting the grapes to sealing your jars for long-lasting enjoyment. Whether you’re a beginner in the kitchen or a seasoned home cook, this guide ensures sweet success every time. Why White Grape Jelly Is a Kitchen Favorite White grape jelly stands out for its delicate flavor and versatility. Unlike darker grape varieties, white grapes offer a lighter sweetness and subtle aroma that pairs perfectly with toast, sandwiches, desserts, and even cheese platters. Some reasons people love making white grape jelly at home include: Natural Sweetness: No need for excessive sugar—the grapes provide a mild, natural flavor. Homemade Quality: You control every ingredient, ensuring freshness and purity. Gift-Worthy: Homemade jelly makes a perfect gift for friends and family. Versatility: Use it in cooking, baking, or as a simple spread. With this in mind, let’s move on to the heart of the recipe—the ingredients. Ingredients for White Grape Jelly To make this white grape jelly recipe, you’ll need fresh, high-quality grapes and a few pantry staples. Here’s the list: 4 pounds of white grapes (seedless varieties like Thompson or Concord work best) 4 cups granulated sugar 1/4 cup lemon juice (freshly squeezed is ideal) 1 packet fruit pectin (powdered or liquid, depending on preference) Optional: pinch of butter (to reduce foam during cooking) Tip: Always wash grapes thoroughly and remove any stems or spoiled fruits. Fresh, ripe grapes make all the difference in flavor. Equipment You’ll Need Making jelly requires some basic kitchen tools. For this step-by-step guide, make sure you have: Large stockpot or saucepan Potato masher or blender Fine mesh strainer or jelly bag Measuring cups and spoons Wooden spoon Candy thermometer (optional but helpful) Sterilized jars with lids Using the right equipment ensures smooth, clear jelly and avoids any surprises in texture or flavor. Step 1: Preparing the Grapes The first step in making white grape jelly is preparing your fruit. Wash the grapes thoroughly under cold running water. Remove stems and discard any bruised or overripe grapes. Place the grapes in a large stockpot and crush them using a potato masher. Crushing helps release the natural juice, which is essential for a flavorful jelly. Pro Tip: If you prefer a smoother jelly, blend the grapes in a food processor before cooking. This reduces cooking time and helps extract more juice. Step 2: Cooking the Grapes Once your grapes are crushed, it’s time to cook: Place the crushed grapes in a large stockpot over medium heat. Add the lemon juice. The acid in lemon juice helps the pectin set and balances the sweetness. Bring the mixture to a gentle boil, stirring occasionally. Reduce heat and simmer for about 10–15 minutes until the grapes are soft and have released enough juice. Step 3: Extracting the Juice Now that your grapes are cooked, you’ll need to separate the juice from the pulp. This is crucial for clear jelly. Pour the cooked grapes through a fine mesh strainer or jelly bag. Press gently with a spoon to extract as much juice as possible. Avoid pressing too hard if you want crystal-clear jelly, as this can force pulp and seeds through. You should now have a bowl of fragrant, golden grape juice ready for the next step. Step 4: Preparing the Jelly Mixture With the juice ready, it’s time to mix in sugar and pectin: Pour the grape juice into a clean stockpot. Stir in the fruit pectin according to the package instructions. Some pectins require you to mix with sugar first; check your specific type. Add the sugar gradually, stirring constantly. Tip: Using a wooden spoon prevents the mixture from sticking to the bottom. Step 5: Boiling to Perfection Boiling is the most critical step for ensuring your jelly sets perfectly: Bring the grape juice, sugar, and pectin mixture to a rolling boil over medium-high heat. Stir constantly to prevent scorching. Boil for 1–2 minutes (or as recommended on the pectin package). A rolling boil is when the liquid is boiling powerfully and cannot be stirred down. This ensures proper gelling. Step 6: Skimming Foam During boiling, foam may form on the surface. While harmless, it can affect the clarity of your jelly: Use a spoon to gently skim off foam. Optionally, add a small pinch of butter to reduce foam formation. This small step makes your white grape jelly look professionally clear and polished. Step 7: Canning and Storing Proper storage is essential to preserve your jelly for months: Pour the hot jelly into sterilized jars, leaving about 1/4 inch of headspace. Wipe jar rims clean and seal with lids. Process jars in a boiling water bath for 10 minutes to ensure they are airtight. Remove and let cool completely. Storage Tip: Store sealed jars in a cool, dark place. Once opened, keep refrigerated and use within a few weeks. Step 8: Enjoying Your White Grape Jelly Now comes the fun part—tasting! Your white grape jelly can be enjoyed in various ways: Spread on toast, muffins, or bagels Used as a filling for cakes and pastries Paired with cheeses for a sweet-savory contrast Glazed over roasted fruits or meats Its smooth texture and delicate sweetness make it a versatile kitchen favorite. Tips for Sweet Success To ensure every batch of white grape jelly is perfect, keep these tips in mind: Use ripe grapes: Sweet, fully ripe grapes yield the best flavor. Measure perfectly: Jelly is a chemistry experiment; proper sugar-to-juice ratios matter. Follow pectin instructions: Different brands may vary—don’t skip this. Avoid overcooking: Overcooking can make jelly too thick or alter the flavor. Sterilize jars: This prevents spoilage and extends shelf life. Variations to Try

Step-by-Step White Grape Jelly Recipe for Sweet Success Read More »

Top Whole Grain Pastry Flour Recipes for Healthy Baking

Top Whole Grain Pastry Flour Recipes for Healthy Baking

If you’re looking to enjoy baked goods without sacrificing health, whole grain pastry flour is your new best friend. This versatile ingredient allows you to create delicious treats that are packed with nutrients, fiber, and flavor. In this article, we’ll explore the top recipes for healthy baking using whole grain pastry flour, along with tips, tricks, and benefits. Whether you’re a beginner or a seasoned baker, these recipes will inspire you to bake smarter and healthier. What is Whole Grain Pastry Flour? Whole grain pastry flour is made from whole wheat grains that have been finely milled to a lighter texture than regular whole wheat flour. Unlike refined flours, it retains the bran, germ, and endosperm, giving you more fiber, vitamins, and minerals in every bite. It’s perfect for baked goods like cookies, muffins, scones, and pie crusts where a tender, soft texture is desired. Key benefits include: High fiber content – Supports digestion and promotes satiety. Rich in nutrients – Contains vitamins B, E, magnesium, and iron. Better blood sugar control – Slower digestion helps prevent spikes. Enhanced flavor – Adds a subtle nutty taste to your baked goods. Tips for Baking with Whole Grain Pastry Flour Baking with whole grain pastry flour is slightly different from using all-purpose flour. Here are some tips to ensure your baked goods turn out perfectly: Combine with Other Flours: Mixing with all-purpose or bread flour can make your baked goods lighter. A 50/50 ratio is a great starting point. Adjust Liquid: Whole grain flour absorbs more liquid. You may need to slightly increase milk, water, or oil in your recipes. Do Not Overmix: Overmixing can develop gluten, making baked goods dense. Mix just until combined. Rest the Dough: Letting dough rest for 20–30 minutes allows the flour to hydrate, improving texture. Experiment with Sweeteners: Using natural sweeteners like honey or maple syrup complements the nutty flavor of whole grain flour. Top Whole Grain Pastry Flour Recipes Here are some of the best recipes to enjoy healthy baking with whole grain pastry flour. Each recipe is designed to be easy, flavorful, and nutritious. 1. Whole Grain Pastry Flour Chocolate Chip Cookies Chocolate chip cookies don’t have to be unhealthy. Using whole grain pastry flour gives you cookies that are chewy, flavorful, and packed with fiber. Ingredients: 1 ½ cups whole grain pastry flour ½ teaspoon baking soda ¼ teaspoon salt ½ cup coconut oil or unsalted butter ½ cup brown sugar ¼ cup maple syrup 1 large egg 1 teaspoon vanilla extract ¾ cup dark chocolate chips Instructions: Preheat the oven to 350°F (175°C) and line a baking sheet with parchment paper. In a bowl, whisk together flour, baking soda, and salt. In another bowl, mix coconut oil, brown sugar, and maple syrup until smooth. Add the egg and vanilla, then combine with dry ingredients. Fold in chocolate chips gently. Scoop dough onto the baking sheet and bake for 10–12 minutes. Cool slightly and enjoy a healthier chocolate treat. Tip: For extra chewiness, refrigerate the dough for 30 minutes before baking. 2. Whole Grain Pastry Flour Banana Muffins Banana muffins are naturally sweet and moist. Using whole grain pastry flour adds nutrients and a soft texture. Ingredients: 1 ¾ cups whole grain pastry flour 1 teaspoon baking soda ½ teaspoon baking powder ¼ teaspoon salt ½ teaspoon cinnamon 3 ripe bananas, mashed ½ cup Greek yogurt ⅓ cup honey 1 teaspoon vanilla extract ¼ cup melted coconut oil Instructions: Preheat the oven to 375°F (190°C) and line a muffin tin. Mix flour, baking soda, baking powder, salt, and cinnamon in a bowl. In another bowl, combine mashed bananas, yogurt, honey, vanilla, and coconut oil. Fold wet ingredients into dry ingredients gently. Fill muffin cups ¾ full and bake for 18–20 minutes. Let cool slightly before serving. Tip: Add walnuts or dark chocolate chips for added flavor and texture. 3. Whole Grain Pastry Flour Apple Cinnamon Scones Scones are a perfect breakfast treat or afternoon snack. Whole grain pastry flour makes them tender while keeping them wholesome. Ingredients: 2 cups whole grain pastry flour ¼ cup coconut sugar 1 tablespoon baking powder ½ teaspoon salt ½ teaspoon cinnamon ½ cup cold unsalted butter, cubed ½ cup milk 1 teaspoon vanilla extract 1 apple, peeled and diced Instructions: Preheat the oven to 400°F (200°C). Combine flour, sugar, baking powder, salt, and cinnamon in a bowl. Cut in butter until mixture resembles coarse crumbs. Mix in milk and vanilla to form a soft dough. Fold in diced apple gently. Shape dough into a circle and cut into 8 wedges. Bake for 18–20 minutes until golden. Tip: Brush scones with a little milk before baking for a golden top. 4. Whole Grain Pastry Flour Pie Crust Make your pies healthier without sacrificing flakiness. Whole grain pastry flour creates a tender, flavorful crust. Ingredients: 2 ½ cups whole grain pastry flour ½ teaspoon salt 1 cup cold unsalted butter, cubed 6–8 tablespoons ice water Instructions: In a bowl, mix flour and salt. Cut in butter until the mixture resembles coarse crumbs. Add ice water one tablespoon at a time until dough forms. Divide dough into two discs and chill for 1 hour. Roll out and use for pies or tarts. Tip: Chill your pie dough before baking to keep it flaky. 5. Whole Grain Pastry Flour Pancakes Start your day with fluffy, healthy pancakes using whole grain pastry flour. Ingredients: 1 ½ cups whole grain pastry flour 1 tablespoon baking powder ¼ teaspoon salt 1 tablespoon coconut sugar 1 ¼ cups milk 1 large egg 2 tablespoons melted butter or coconut oil 1 teaspoon vanilla extract Instructions: Mix flour, baking powder, salt, and sugar in a bowl. In another bowl, whisk milk, egg, butter, and vanilla. Combine wet and dry ingredients, mixing gently. Heat a nonstick skillet over medium heat and cook pancakes until bubbles form, then flip. Serve with fresh fruit or a drizzle of maple syrup. Tip: For extra fiber, add chia seeds or flaxseeds

Top Whole Grain Pastry Flour Recipes for Healthy Baking Read More »

Best Whole Hog Potato Salad Recipe Ever Made

Best Whole Hog Potato Salad Recipe Ever Made

If you are looking for the best whole hog potato salad recipe ever made, you are in the right place. This classic Southern-style potato salad is rich, creamy, smoky, and packed with bold flavor. It is the kind of side dish that turns a simple barbecue into a full celebration. Whole hog potato salad is not just food. It is a tradition. It is family gatherings, outdoor cookouts, church picnics, and backyard parties. When served alongside slow-cooked pork, grilled meats, and fresh bread, it becomes the star of the table. In this complete guide, you will learn everything — from ingredients and step-by-step orders to expert tips, flavor variations, and storage advice. Let’s make the most delicious potato salad you have ever tasted. What Is Whole Hog Potato Salad? Whole hog potato salad is a Southern barbecue side dish traditionally served with whole hog roast. In many Southern states like North Carolina and South Carolina, whole hog barbecue means roasting an entire pig slowly over wood coals for hours. The potato salad served with it is creamy but slightly tangy. It balances the smoky richness of pork. The combination is unforgettable. While you may not be roasting a full hog at home, you can still enjoy this traditional style potato salad with grilled pork, ribs, or even fried chicken. Why This Is the Best Whole Hog Potato Salad Recipe Ever Made This recipe stands out because it: Uses perfectly cooked potatoes (never mushy) Has the right balance of creaminess and tang Includes a slight crunch from celery and onions Blends mustard and mayonnaise for classic Southern flavor Gets better after resting in the fridge It is simple but deeply flavorful. Every bite feels homemade and comforting. Ingredients You Will Need Here are the key ingredients for the best whole hog potato salad recipe ever made: Main Ingredients 3 pounds Yukon Gold or Russet potatoes 1 cup real mayonnaise 2 tablespoons yellow mustard 1 tablespoon apple cider vinegar 1 teaspoon sugar 1 teaspoon salt (adjust to taste) ½ teaspoon black pepper 3 hard-boiled eggs, chopped ½ cup finely diced celery ½ cup finely diced red onion 2 tablespoons sweet pickle relish Optional Add-Ins Smoked paprika Chopped fresh parsley Crumbled bacon A splash of pickle juice These ingredients create the perfect Southern-style texture and flavor profile. Choosing the Right Potatoes The secret to the best whole hog potato salad recipe ever made starts with the potatoes. Yukon Gold Potatoes Creamy texture Hold their shape well Slight buttery flavor Russet Potatoes Softer texture Absorb dressing well More traditional in Southern recipes If you want firm chunks, choose Yukon Gold. If you prefer softer, creamier salad, go with Russets. Step-by-Step Instructions Step 1: Prepare the Potatoes Wash and peel the potatoes. Cut them into evenly sized cubes. Place them in a large pot. Cover with cold salted water. Bring to a boil. Cook for 10–15 minutes until fork-tender. Do not overcook. Drain immediately and let cool slightly. Step 2: Prepare the Dressing In a large mixing bowl combine: Mayonnaise Mustard Apple cider vinegar Sugar Salt Black pepper Mix until smooth and creamy. Taste and adjust seasoning if needed. Step 3: Combine Ingredients While the potatoes are still slightly warm: Gently fold them into the dressing. Add chopped eggs. Add celery, onion, and relish. Stir carefully to avoid breaking potatoes. The warm potatoes absorb flavor better. Step 4: Chill for Maximum Flavor Cover and refrigerate for at least 2–4 hours. Overnight is even better. This resting time allows the flavors to blend perfectly. The Secret to Southern-Style Flavor Southern whole hog potato salad has a few unique traits: It leans slightly tangy It often includes mustard It uses real mayonnaise (not salad dressing substitutes) It has subtle sweetness The balance between creamy and tangy is what makes it special. What Makes It Perfect for Whole Hog BBQ? Whole hog barbecue is smoky and rich. Potato salad works as a cooling contrast. The creamy texture softens the bold pork flavor. The vinegar and mustard cut through the fat. Together, they create harmony on the plate. In traditional Southern barbecue gatherings, potato salad is almost as important as the meat itself. Pro Tips for the Best Texture 1. Salt the Water Well Potatoes absorb flavor while boiling. 2. Do Not Overcook Mushy potatoes ruin texture. 3. Mix While Slightly Warm Warm potatoes absorb dressing better. 4. Chill Before Serving Cold potato salad tastes better and firms up. Flavor Variations You Can Try Smoky Whole Hog Potato Salad Add: Smoked paprika Crumbled bacon A touch of barbecue sauce This pairs beautifully with grilled pork shoulder. Extra Tangy Version Add: Extra mustard More vinegar A splash of pickle juice Perfect for heavy smoked meats. Creamy Deviled Egg Style Add: Extra chopped eggs A pinch of paprika A dash of hot sauce This version is richer and more indulgent. Serving Ideas Serve your best whole hog potato salad recipe ever made with: Pulled pork sandwiches Grilled chicken Smoked ribs Fried catfish Cornbread It also pairs beautifully with baked beans and coleslaw. How to Store Leftovers Store in airtight container Refrigerate immediately Consume within 3–4 days Do not leave out longer than 2 hours Potato salad contains mayonnaise and eggs, so proper storage is important. Can You Make It Ahead? Yes — and you should. This recipe actually tastes better the next day. Make it: 1 day before your BBQ Stir before serving Adjust seasoning if needed Common Mistakes to Avoid Overmixing Breaks potatoes and makes them mushy. Undersalting Leads to bland flavor. Not Chilling Freshly mixed potato salad tastes flat. Too Much Mayo Makes it heavy instead of balanced. Why This Recipe Always Wins at BBQs This version is crowd-tested. It has: Classic Southern flavor Balanced creaminess Perfect texture Just enough crunch A slight tangy finish It complements smoked meats without control. When people take seconds, you know you made it right. The History Behind Whole Hog Traditions Whole hog barbecue has deep roots in the American South. Cooking

Best Whole Hog Potato Salad Recipe Ever Made Read More »

Scroll to Top