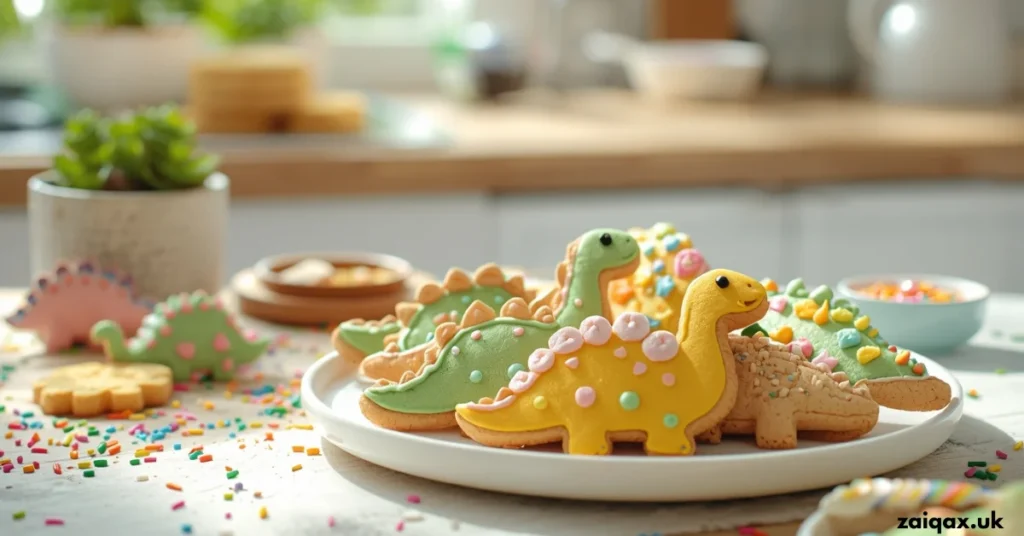
Dino Cookies Recipe Easy Cute Snack Kids Absolutely Love
If you are searching for a fun, adorable, and delicious treat that kids instantly fall in love with, this Dino Cookies Recipe Easy Cute Snack Kids Absolutely Love is exactly what you need. These cookies are not just about taste—they bring creativity, color, and excitement into your kitchen. Perfect for birthdays, lunchboxes, or weekend baking, dino cookies turn simple ingredients into magical little treats that spark joy in children and adults alike. In this complete guide, you will learn how to make dino cookies step by step, along with expert tips, variations, mistakes to avoid, and answers to common questions. Even if you are a beginner, this recipe is simple enough to follow and guarantees amazing results. Why Kids Absolutely Love Dino Cookies Dino cookies are more than just snacks—they are an experience. Here’s why they are so popular: Fun Shapes: Dinosaur shapes instantly grab kids’ attention Colorful Designs: Bright icing and decorations make them visually exciting Interactive Baking: Kids love helping cut and decorate cookies Perfect for Events: Ideal for birthdays, school snacks, and themed parties These cookies combine creativity and flavor, making them one of the best homemade treats for kids. Ingredients for Dino Cookies Recipe To make these easy dino cookies, you will need simple pantry ingredients: For the Cookie Dough: 2 ½ cups all-purpose flour 1 cup unsalted butter (softened) ¾ cup sugar 1 large egg 1 teaspoon vanilla extract ½ teaspoon baking powder ¼ teaspoon salt For Decoration: Royal icing or buttercream frosting Food coloring (green, yellow, blue, pink) Sprinkles or edible glitter Chocolate chips (optional for eyes) Step-by-Step Dino Cookies Recipe Step 1: Prepare the Dough In a large bowl, cream together butter and sugar until light and fluffy. Add the egg and vanilla extract, mixing well. In another bowl, combine flour, baking powder, and salt. Gradually add dry ingredients to the wet mixture until a soft dough forms. Step 2: Chill the Dough Wrap the dough in plastic wrap and refrigerate for at least 30 minutes. This helps in easy rolling and cutting. Step 3: Roll and Cut Shapes Roll the dough on a floured surface to about ¼-inch thickness. Use dinosaur-shaped cookie cutters to create fun shapes. Step 4: Bake the Cookies Place cookies on a baking tray lined with parchment paper. Bake at 180°C (350°F) for 8–10 minutes or until the edges are lightly golden. Step 5: Cool Completely Allow cookies to cool completely before decorating. This prevents icing from melting. Step 6: Decorate Your Dino Cookies Use colored icing to decorate your cookies. Add eyes, scales, and fun patterns to make each dinosaur unique. Pro Tips for Perfect Dino Cookies Chill dough properly to maintain shape Avoid overbaking to keep cookies soft Use gel food colors for vibrant designs Let kids decorate for a fun family activity Creative Variations of Dino Cookies 1. Chocolate Dino Cookies Add cocoa powder to the dough for a rich chocolate flavor. 2. Stuffed Dino Cookies Fill cookies with chocolate or jam for a surprise center. 3. Healthy Dino Cookies Use whole wheat flour and reduce sugar for a healthier option. 4. Gluten-Free Dino Cookies Replace all-purpose flour with gluten-free flour blend. Decorating Ideas Kids Will Love Green dinos with white spots Rainbow-colored dinosaurs Dinosaur faces with candy eyes Jurassic-themed cookie sets Encourage creativity—no two cookies need to look the same! Common Mistakes to Avoid Skipping dough chilling: Leads to spreading cookies Rolling dough too thin: Cookies may break Over mixing dough: Results in tough cookies Decorating warm cookies: Causes icing to melt Avoiding these mistakes ensures perfect results every time. How to Store Dino Cookies Store in an airtight container at room temperature for up to 5 days Refrigerate for longer freshness (up to 10 days) Freeze undecorated cookies for up to 2 months When to Serve Dino Cookies These cookies are perfect for: Kids’ birthday parties School lunchboxes Family baking days Holiday treats Playdates They are guaranteed to be a hit wherever you serve them. Nutritional Overview (Approximate per cookie) Calories: 120 Carbohydrates: 15g Fat: 6g Sugar: 8g Fun Activity Idea for Kids Turn baking into a learning activity: Teach kids dinosaur names Let them create their own designs Organize a cookie decorating contest This makes the experience both fun and educational. Secret Tips for the Best Dino Cookies Add a pinch of cinnamon for extra flavor Use silicone baking mats for even baking Outline cookies before filling with icing Use toothpicks for detailed designs Why This Dino Cookies Recipe Stands Out This recipe is: Beginner-friendly Budget-friendly Highly customizable Perfect for kids and families It combines simplicity with creativity, making it one of the best cookie recipes you can try at home. Final Thoughts This Dino Cookies Recipe Easy Cute Snack Kids Absolutely Love is more than just a recipe—it’s a fun and memorable experience for the whole family. With simple ingredients and easy steps, you can create adorable cookies that bring smiles to everyone’s faces. Whether you are baking for a party or just spending quality time with your kids, these dino cookies are the perfect choice. Try this recipe today and turn your kitchen into a mini dinosaur world filled with color, creativity, and delicious treats. Frequently Asked Questions
Dino Cookies Recipe Easy Cute Snack Kids Absolutely Love Read More »