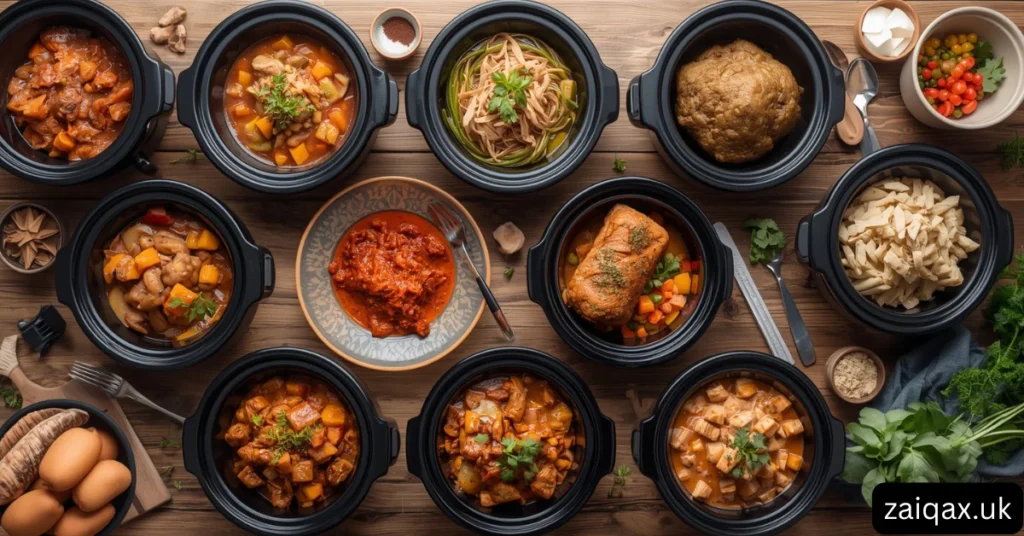
10 Best Whole Thirty Crock Pot Recipes You Must Try Today
If you’re on the Whole30 program or just trying to eat clean, meal planning can sometimes feel overwhelming. The good news is, crock pot recipes can make your life much easier. They are perfect for busy days, require minimal prep, and often taste better the next day. To help you stay on track with your Whole30 lifestyle, we’ve compiled a list of the 10 best Whole Thirty crock pot recipes you must try today. These recipes are flavorful, wholesome, and simple enough for beginners or experienced cooks alike. What is Whole30 and Why Use a Crock Pot? Whole30 is a 30-day nutrition program that focuses on real, unprocessed foods. It eliminates sugar, alcohol, grains, legumes, soy, and dairy to help you reset your body, reduce cravings, and improve overall health. The crock pot, also known as a slow cooker, is a perfect tool for Whole30 recipes because it allows you to cook meals slowly over several hours. This slow cooking method locks in flavor, tenderizes meats, and lets you prepare healthy meals without spending hours in the kitchen. Benefits of Whole30 Crock Pot Recipes Time-Saving: Simply prep ingredients, add them to the crock pot, and let it work its magic. Easy Cleanup: Most recipes require one pot, reducing the mess in your kitchen. Flavorful Meals: Slow cooking allows spices and herbs to penetrate deeply into meat and vegetables. Healthy Ingredients: You control everything you put in your meals, ensuring compliance with Whole30 rules. Versatile Options: From soups and stews to roasts and curries, crock pot recipes cover a variety of tastes and preferences. 1. Whole30 Crock Pot Chicken Curry Ingredients: 2 lbs chicken thighs, boneless and skinless 1 can coconut milk 2 tbsp curry powder 1 tsp turmeric 1 tsp garlic powder 1 onion, chopped 1 cup carrots, sliced 1 cup bell peppers, chopped Salt and pepper to taste Instructions: Place chicken in the crock pot. Add coconut milk, curry powder, turmeric, garlic, and onion. Toss in carrots and bell peppers. Cook on low for 6-7 hours. Serve with cauliflower rice for a complete Whole30 meal. Why You’ll Love It: The curry spices blend beautifully, making this dish rich, aromatic, and satisfying. 2. Crock Pot Whole30 Beef Stew Ingredients: 2 lbs beef stew meat 4 cups beef broth (Whole30 compliant) 3 large carrots, sliced 2 celery stalks, chopped 1 onion, diced 2 cloves garlic, minced 2 tsp thyme 1 tsp paprika Salt and pepper to taste Instructions: Brown beef in a skillet (optional but enhances flavor). Add beef and remaining ingredients to the crock pot. Cook on low for 7-8 hours. Adjust seasoning before serving. Why You’ll Love It: This stew is hearty and perfect for meal prep. Leftovers taste even better the next day. 3. Slow Cooker Whole30 Pulled Pork Ingredients: 3 lbs pork shoulder 1 cup Whole30 approved BBQ sauce 1 tbsp smoked paprika 1 tsp garlic powder 1 tsp onion powder Salt and pepper to taste Instructions: Season pork with spices. Place in the crock pot and pour BBQ sauce over the top. Cook on low for 8 hours. Shred pork with forks and mix with sauce. Why You’ll Love It: This pulled pork is perfect for lettuce wraps or a side of roasted vegetables. 4. Crock Pot Whole30 Chili Ingredients: 1 lb ground beef or turkey 1 zucchini, chopped 1 red bell pepper, diced 1 can diced tomatoes 1 cup beef or chicken broth 2 tsp chili powder 1 tsp cumin 1 tsp paprika Salt and pepper to taste Instructions: Brown meat in a skillet. Add meat and vegetables to the crock pot. Mix in broth, tomatoes, and spices. Cook on low for 5-6 hours. Why You’ll Love It: This chili is rich and filling without the beans, keeping it Whole30 compliant. 5. Whole30 Crock Pot Lemon Garlic Chicken Ingredients: 2 lbs chicken breasts or thighs 3 cloves garlic, minced Juice of 2 lemons 1 tsp paprika 1 tsp thyme 1 cup chicken broth Salt and pepper to taste Instructions: Combine all ingredients in the crock pot. Cook on low for 6 hours. Serve with steamed vegetables or mashed cauliflower. Why You’ll Love It: The lemon and garlic create a tangy, flavorful chicken that’s tender and juicy. 6. Crock Pot Whole30 Sausage and Peppers Ingredients: 1 lb Whole30 approved sausage 2 bell peppers, sliced 1 onion, sliced 2 cloves garlic, minced 1 cup tomato sauce (Whole30 compliant) 1 tsp oregano Salt and pepper to taste Instructions: Add all ingredients to the crock pot. Cook on low for 4-5 hours. Serve hot as a main dish or over cauliflower rice. Why You’ll Love It: This colorful dish is full of flavor and takes minimal effort. 7. Whole30 Crock Pot Ratatouille Ingredients: 1 eggplant, chopped 2 zucchini, sliced 1 bell pepper, chopped 1 onion, diced 2 cloves garlic, minced 2 cups tomato sauce (Whole30 compliant) 1 tsp basil 1 tsp oregano Salt and pepper to taste Instructions: Combine all vegetables and tomato sauce in the crock pot. Cook on low for 6 hours. Serve hot as a side or main dish. Why You’ll Love It: Ratatouille is a vegetable lover’s dream and a perfect way to sneak extra nutrients into your diet. 8. Crock Pot Whole30 Italian Meatballs Ingredients: 1 lb ground beef 1 lb ground pork 1 egg 1/2 cup almond flour 1 tsp garlic powder 1 tsp onion powder Salt and pepper to taste 2 cups Whole30 approved tomato sauce Instructions: Mix meat, egg, almond flour, and seasonings. Form into meatballs and place in the crock pot. Pour tomato sauce over the meatballs. Cook on low for 4-5 hours. Why You’ll Love It: These meatballs are juicy, flavorful, and perfect for an easy dinner with minimal effort. 9. Whole30 Crock Pot Thai Peanut Chicken Ingredients: 2 lbs chicken thighs 1/2 cup coconut milk 1/4 cup almond butter 2 tbsp coconut aminos 1 tsp ginger 1 clove garlic, minced 1 cup broccoli, chopped Salt and pepper to taste Instructions: Mix coconut milk, almond butter, coconut aminos,
10 Best Whole Thirty Crock Pot Recipes You Must Try Today Read More »